Solar water heaters are an efficient and sustainable way to heat water by harnessing the power of the sun. They offer numerous advantages, including reducing energy bills and minimizing our carbon footprint. If you have an existing water heater and want to switch to solar power, our step-by-step guide on retrofitting will help you achieve just that. It provides a clear and concise overview of the process, enabling you to make the necessary modifications to your current system and start reaping the benefits of solar energy.
Top-selling solar water heaters for efficient heating


Assessing the feasibility
To determine if your existing water heater is suitable for retrofitting to solar power, you need to assess a few key factors. First, consider the age and condition of your water heater, as older or damaged units may not be compatible with the solar conversion process. Next, evaluate the available roof space for solar panels, making sure there is enough area to install the necessary panels. Finally, take into account your local climate conditions, as areas with limited sunlight or extreme weather may not be optimal for solar-powered water heating.


Gathering the necessary equipment
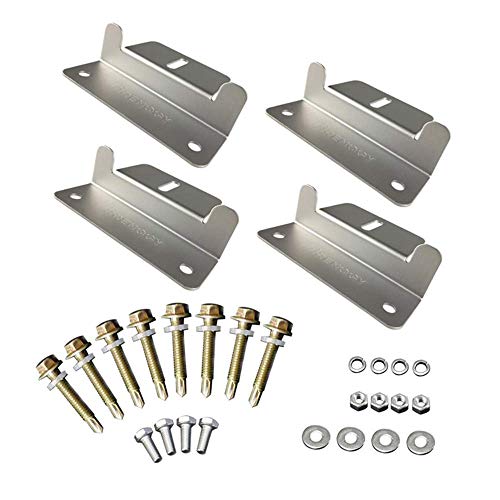
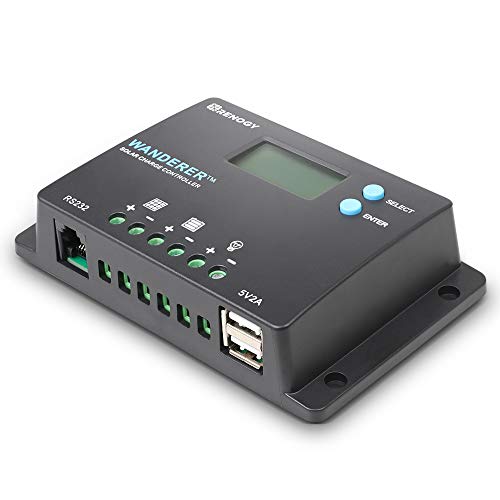
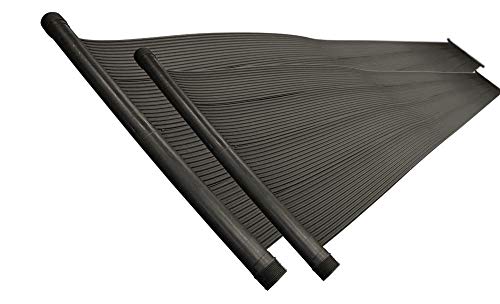
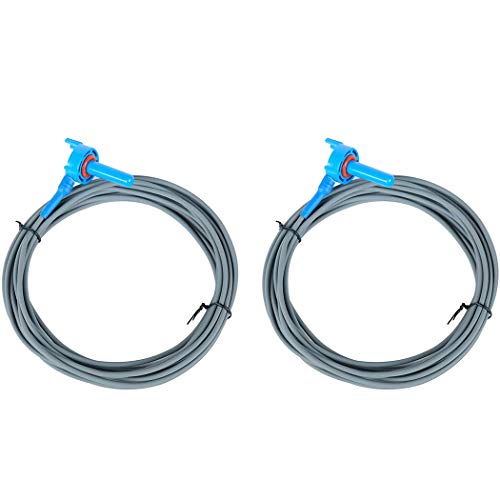
To gather the necessary equipment for your solar water heating system, start by researching the specific components needed. Some examples of equipment include solar panels, mounting brackets, a solar controller, a circulation pump, a heat exchanger, and connecting pipes. Ensure that all the components you choose are compatible with your existing water heater. Look for reputable suppliers and compare prices to make sure you get the best quality equipment at the most affordable price.
Once you have identified the equipment you need, you can acquire it through various means. You can purchase the items from a local supplier or order them online. It’s important to read reviews and check the specifications of each component before purchasing to ensure they meet your requirements. Be sure to double-check the compatibility of the equipment with your existing water heater before finalizing any purchases.
Remember that the equipment you choose will depend on your specific needs and circumstances. For example, if you live in an area with abundant sunlight, you may require fewer solar panels compared to someone living in a less sunny location. Similarly, the size of your existing water heater and the amount of hot water you use daily will also impact the specific equipment you need. By researching and acquiring the required equipment, you’ll be on your way to setting up a successful solar water heating system.
Preparing the water heater
To prepare the water heater, start by shutting off the power supply and draining the water from the tank. Disconnect any electrical or gas connections to ensure safety. Next, it’s important to clean the tank thoroughly to remove any sediment or debris that may have accumulated over time. This will help improve the efficiency and prolong the lifespan of the water heater.

Installing the solar panels
To install the solar panels, begin by mounting them on the roof or any suitable location that receives optimal sun exposure. Ensure proper alignment by positioning the panels at the recommended angle. Securely fasten the panels in place using appropriate mounting brackets or hardware. Next, connect the solar panels to the solar controller according to the manufacturer’s instructions. This may involve wiring the positive and negative terminals of the panels to the corresponding terminals on the controller. Double-check all connections to ensure proper contact and avoid any loose connections.
Connecting the circulation system
To connect the circulation system, start by installing the circulation pump and connecting it to the solar controller. For example, you may need to mount the pump in a convenient location near the water heater and connect the wiring to the controller. Then, install a heat exchanger in the existing water heater by connecting it to the appropriate fittings. Finally, connect the circulation pipes between the solar collector, heat exchanger, and water heater. This may involve using appropriate connectors and securing the pipes to prevent leaks.

Wiring and electrical connections
To wire the solar controller, circulation pump, and any other electrical components, first, refer to the manufacturer’s instructions. These guidelines will provide you with specific wiring diagrams and instructions for each component. Pay close attention to the recommended wire sizes, as using incorrect sizes can lead to voltage drop or overheating.
For example, if you are wiring a solar controller, check the manufacturer’s instructions for the recommended wire gauge. You will then need to connect the positive and negative terminals of the solar panels to the corresponding terminals on the solar controller. Use proper wire connectors, such as MC4 connectors, to securely attach the wires and ensure good electrical contact.
When wiring a circulation pump, you may need to connect it to a power source, such as a solar battery. Locate the appropriate terminals on the pump and connect the positive and negative wires from the power source using wire nuts or terminal blocks. Ensure that the connections are tight and properly insulated to prevent any potential electrical hazards.
In addition to wiring, it is crucial to implement proper grounding and safety measures. This includes connecting the equipment to a grounding system and using circuit breakers or fuses to protect against electric shock and fire hazards. Make sure to follow local electrical codes and regulations.
Remember, always consult the manufacturer’s instructions and follow recommended guidelines to ensure the proper wiring and electrical connections of your solar system. Failure to do so may result in equipment damage, safety hazards, or inefficient operation.
Filling and testing the system
To refill the water heater with water, follow these steps:
- Ensure that the water supply to the water heater is turned off.
- Locate the water inlet valve on the water heater and open it.
- Attach a hose to the water inlet valve and place the other end into a suitable drain or outside area.
- Slowly turn on the water supply and allow the water heater to fill. Keep an eye on the pressure gauge to ensure proper pressure is maintained as recommended by the manufacturer.
- Once the water heater is full, close the water inlet valve.
- Check for any signs of water leaks around the water heater.
Next, test the system for leaks and proper functioning:
- Turn on all the faucets connected to the system and allow them to run for a few minutes.
- Check for any leaks or water dripping from pipes, fittings, or other connections.
- Additionally, inspect the water heater and surrounding areas for any signs of water leakage.
- If any leaks are detected, address them promptly by tightening connections or contacting a professional plumber.
Finally, adjust the settings on the solar controller:
- Consult the manufacturer’s recommendations or user manual for the specific instructions on adjusting the settings of your solar controller.
- Make any necessary adjustments to the temperature settings, timer functions, or other parameters as suggested by the manufacturer.
- Take note of the recommended settings for optimal performance and energy efficiency.
Remember to follow safety precautions and refer to the specific guidelines provided by your water heater and solar controller manufacturer.
Monitoring and maintenance
Regularly monitor the performance of your solar water heater system. Check for any leaks by visually inspecting all the joints and connections. Monitor the pressure and temperature readings on the control panel to ensure they are within the recommended range. Periodically clean the solar panels to remove any dust or debris that may reduce their efficiency. Refer to the manufacturer’s guidelines for specific maintenance tasks and frequency. Following these steps will help keep your solar water heater system running smoothly and efficiently.
Key Takeaways
In conclusion, retrofitting an existing water heater to make it solar-powered offers several benefits. Not only does it help reduce reliance on fossil fuels and decrease carbon emissions, but it also helps lower energy bills in the long run. Throughout this guide, we have discussed the step-by-step process of retrofitting, including the installation of solar collectors, the integration with the existing water heater, and the necessary adjustments. We have stressed the importance of proper installation and maintenance to ensure optimal performance and efficiency. By following these guidelines, homeowners can take a significant step towards a more sustainable and eco-friendly energy solution. So, let’s make the most of our existing water heaters and harness the power of the sun to create a greener future for all of us.
Necessary Equipment