


In this step-by-step guide, we will explain how to calculate the charging time for a solar charger. The purpose of this guide is to help you understand how long it will take to charge your devices using solar power, so you can plan accordingly and make the most of your solar charger. By following the steps outlined in this guide, you will be able to determine the charging time based on the capacity of your charger and the energy requirements of your devices.
Top-selling solar chargers for all your power needs
![[Upgraded]BigBlue 3 USB-A 28W Solar Charger(5V/4.8A Max), Portable SunPower Solar Panel Charger for Camping, IPX4 Waterproof, Compatible with iPhone 11/XS/XS Max/XR/X/8/7, iPad, Samsung Galaxy LG etc.](https://m.media-amazon.com/images/I/7149yKEQLaL._SS520_.jpg)

Understand the specifications of the solar charger
To understand the specifications of the solar charger, start by reading the manufacturer’s information. Look for details on the battery capacity, which is usually provided in ampere-hours (Ah) or milliampere-hours (mAh). Additionally, identify the solar panel’s maximum charging current, which is typically listed in amperes (A) or milliamperes (mA). By reviewing these specifications, you’ll gain a better understanding of the charger’s capabilities and how it can meet your charging needs.


Determine the charging time formula
To check if the manufacturer provides a charging time formula, refer to the user manual or consult the manufacturer’s website. If no formula is provided, you can use the following formula to calculate charging time: Charging Time (in hours) = Battery Capacity / Solar Panel Charging Current.
For example, if you have a battery capacity of 100 Ah and a solar panel charging current of 10 A, the charging time can be calculated as 100 Ah / 10 A = 10 hours.
This formula is useful for determining the approximate charging time based on the battery capacity and the solar panel charging current. However, keep in mind that other factors such as weather conditions, charge controller efficiency, and battery condition may affect the actual charging time.
Convert units if necessary
To ensure the battery capacity and charging current are in the same units, first check the unit of measurement for both values. If they are not already in the same units, you will need to convert them accordingly. For example, if the battery capacity is given in milliamp-hours (mAh) and the charging current is given in amperes (A), you will need to convert one of the values to the other unit by using the appropriate conversion factor. Once both values are in the same units, you can proceed with calculating the charging time or any other necessary calculations.
Account for charging efficiency
To account for the charging efficiency of a solar charger, multiply the charging time by the efficiency factor. The efficiency factor is usually a decimal less than 1, representing the percentage of energy actually being converted and stored by the charger. By multiplying the charging time by this factor, you can obtain the estimated time it will take for the charger to fully charge a device. For example, if the charger’s efficiency factor is 0.85 and the charging time is 4 hours, the estimated charging time would be 4 hours multiplied by 0.85, which equals 3.4 hours. This estimation takes into consideration any energy losses during the charging process and provides a more accurate prediction of the actual charging time.


Consider environmental factors
Take into account external factors such as sunlight intensity, shading, and temperature that may affect the charging efficiency. Adjust the estimated charging time accordingly. To ensure optimal charging, position the solar panel in a location where it receives direct sunlight for the majority of the day, avoiding any obstructions that may cause shading. Additionally, consider the impact of temperature on the performance of the solar charger, as extreme heat or cold can affect its efficiency. Monitoring these environmental factors will help you make informed adjustments to the estimated charging time and maximize the charging efficiency of your device.
Calculate the charging time for a specific battery
To calculate the charging time for a specific battery, first gather the battery capacity (in ampere-hours) and the solar panel charging current values. Next, apply the charging time formula: charging time = battery capacity / charging current. Divide the battery capacity by the charging current to determine the estimated time it will take to charge the battery using the solar panel.
Verify compatibility
To ensure compatibility between the charging device and the battery, it is important to verify that the calculated charging time falls within the acceptable range recommended by the battery manufacturer. This can be done by referring to the user manual or consulting the manufacturer’s website for the specific battery model. For example, if the user manual states that the recommended charging time for a certain battery is between 4-6 hours, we need to ensure that our calculated charging time falls within this range.
Consider backup charging options
If the calculated charging time is longer than desired, we recommend exploring alternative charging options. Consider using multiple solar panels or a higher wattage solar charger to speed up the process. For example, instead of relying on a single 100-watt solar panel, using two 100-watt panels will increase the power output and reduce the charging time. Similarly, opting for a higher wattage solar charger, such as a 200-watt charger, will also provide faster charging. By considering these backup options, you can ensure a more efficient charging experience.
Re-evaluate periodically
- To ensure optimal charging performance, it is important to periodically re-evaluate the charging time of your solar charger.
- Check the health of your battery and the efficiency of your solar charger, as these factors may change over time.
- Recalculate the charging time based on any variations in battery health and solar charger performance.
- This will help you determine if any adjustments or maintenance are needed to maintain the efficiency of your solar charging system.
Plan for optimal charging
Note the estimated charging time provided by your solar charger and carefully plan your usage accordingly. This will help ensure that your battery is fully charged when you need it, allowing you to make the most of your device without worrying about running out of power. By keeping track of the estimated charging time and aligning your usage patterns accordingly, you can optimize the charging process and enjoy the benefits of a fully charged battery.
Summarizing the charging time calculation
In conclusion, understanding the specifications of a solar charger is crucial in calculating its charging time. It is important to consider factors such as efficiency and environmental conditions to get the most accurate estimate. Additionally, it is advisable to periodically re-evaluate the charging time to account for any changes in the setup or conditions. By following these steps, we can ensure optimal performance and make the most of our solar chargers.
Efficiency Boosting Tips
Step-by-Step Instructions for Efficiently Using Top Solar Chargers
- Before using the solar charger, make sure it is fully charged by placing it under direct sunlight for at least 6-8 hours. This will ensure that it has enough power to charge your devices
- Connect your device to the solar charger using the appropriate charging cable. Most solar chargers come with multiple USB ports, so you can charge more than one device at a time if needed
- Position the solar charger under direct sunlight, preferably in an open area without any obstructions. Keep in mind that the efficiency of solar charging can vary depending on the weather conditions and the angle of the sun
- Monitor the charging progress by checking the LED indicators on the solar charger. These indicators usually show the charging status and the remaining battery level
- Be patient while using a solar charger, as it may take longer to charge your devices compared to traditional wall chargers. The charging speed can also be affected by the capacity of the solar charger and the power requirements of your devices
- Remember, properly utilizing a solar charger requires understanding its capabilities and limitations. By following these steps, you can effectively utilize a top solar charger and keep your devices powered even when you’re on the go
Frequently Asked Questions about Top Solar Chargers
What are the different types of solar chargers available in the market?
There are several types of solar chargers available in the market today. These chargers utilize solar power to generate electricity and charge various devices such as smartphones, tablets, cameras, and more. Here are the different types of solar chargers you can find:
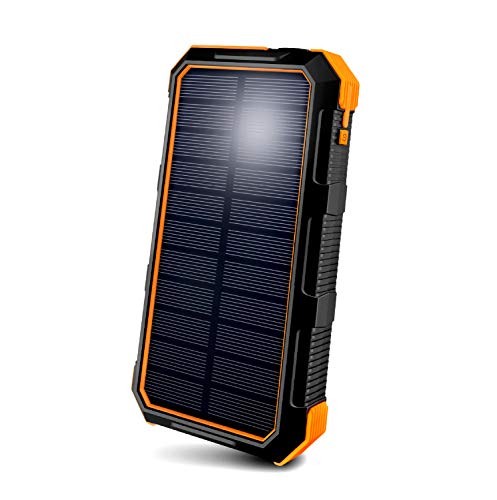
- Solar Power Banks: These portable chargers come with built-in solar panels, allowing you to charge them by simply placing them under the sun. They usually have multiple USB ports to charge different devices simultaneously.
- Solar Backpacks: These backpacks feature solar panels integrated into their design. They are ideal for outdoor enthusiasts as they allow you to charge your devices while on the go. The solar panels harness sunlight during your outdoor activities, storing energy to charge your devices later.
- Solar Phone Cases: These are phone cases with built-in solar panels that directly charge your smartphone. They are compact and offer a convenient way to charge your phone on the move.
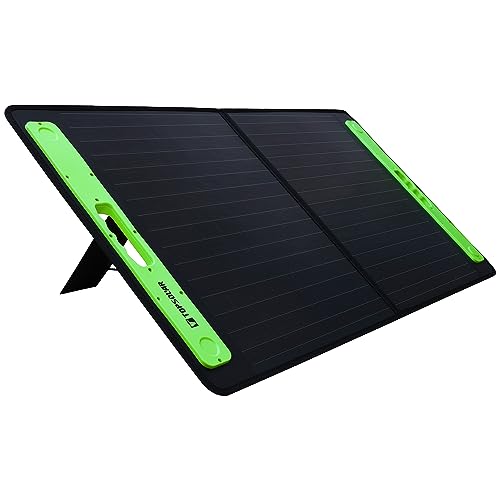
- Portable Solar Panels: These small and foldable panels are lightweight and easily portable. They can be set up anywhere with access to sunlight to charge your devices. Portable solar panels often come with USB ports, making them compatible with a wide range of devices.
- Solar Chargers for Camping: Designed specifically for camping and other outdoor activities, these chargers are rugged and durable. They are usually designed to withstand harsh weather conditions while providing a reliable source of renewable power for charging your devices.
- Solar Chargers for Outdoor Lighting: These chargers are designed to charge batteries or power LED lights. They are useful for lighting up outdoor areas such as gardens, patios, and pathways using solar energy.
- Solar Chargers for Vehicles: These chargers are designed for charging the batteries of cars, boats, and recreational vehicles. They are typically mounted on the vehicle’s roof and can charge the vehicle’s battery while providing power to other devices.