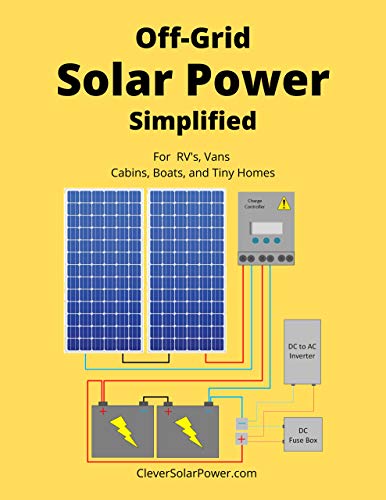
In this step-by-step guide, we will walk you through the process of wiring an off-grid power system. Off-grid power systems are standalone setups that allow you to generate and store electricity without relying on a connection to the main power grid. This guide aims to provide clear and concise instructions on how to wire an off-grid power system, so you can generate and utilize your own electricity in a sustainable and independent way.
Top-selling sustainable power solutions for off-grid living


Step 1: Assess your power needs
To determine the amount of power you will need for your off-grid system, start by considering all the appliances, lights, and other electrical devices that will be powered by the system. Make a list of these items and note their power ratings, usually measured in watts. For example, if you have a refrigerator that consumes 150 watts, a laptop that consumes 50 watts, and three LED lights that consume 10 watts each, your total power requirement would be 150 + 50 + (3 x 10) = 210 watts. By assessing your power needs in this way, you can accurately choose the right components, such as solar panels and batteries, to meet your system’s requirements.


Step 2: Choose the right components
To ensure a successful off-grid power system, you need to select the necessary components. Here’s a guide on how to choose the right components for your system:
- Solar Panels: Determine the number and wattage of solar panels you need based on your power consumption. Consider factors such as available sunlight, panel efficiency, and space constraints.
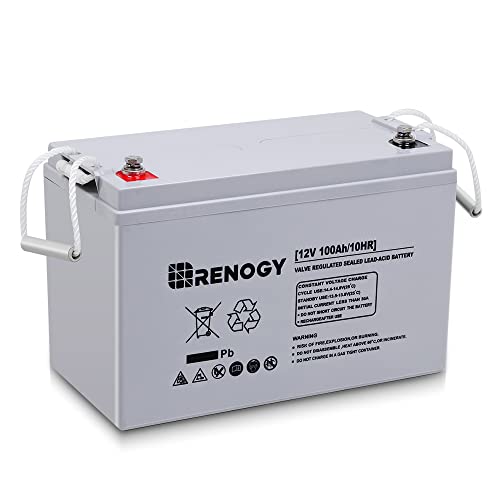
- Batteries: Select batteries with sufficient capacity to store excess energy generated by the solar panels. Consider the depth of discharge, cycle life, and voltage compatibility with other components.
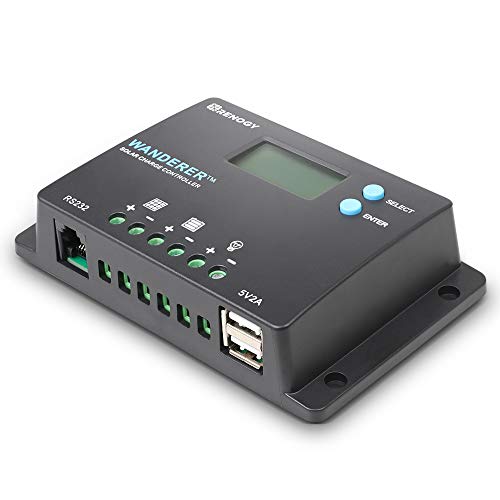
- Charge Controller: Choose a charge controller that matches the voltage and current capacity of your solar panels. Consider features like maximum power point tracking (MPPT) for efficient power conversion and protection against overcharging.
- Inverter: Select an inverter that can handle the maximum power demand of your appliances. Consider the inverter type (pure sine wave or modified sine wave) based on the sensitivity of your electrical devices.
- Wiring: Choose appropriate gauge wiring to ensure efficient power transmission. Consider factors like distance, current capacity, and voltage drop calculations.
Remember, the size and capacity of each component should align with your power needs. This will ensure optimal performance and reliability of your off-grid power system.
Step 3: Design the system layout
To create a layout plan for your off-grid power system, start by determining the ideal placement for solar panels, batteries, and other components. Consider factors such as sunlight exposure, accessibility, and safety. Identify the areas that receive the most direct sunlight throughout the day to maximize solar panel efficiency and ensure optimal energy production. Additionally, ensure that the components are easily accessible for maintenance purposes and that they are installed in a safe location, away from potential hazards. By carefully considering these factors, you can design a system layout that maximizes the performance and safety of your off-grid power system.


Step 4: Install solar panels
To mount the solar panels in the chosen location, secure the mounting brackets to the roof or ground using screws or bolts. Ensure that the panels are positioned at the optimal angle for capturing sunlight and avoiding obstructions. For example, if you are mounting the panels on a flat roof, you can use ballasted mounts that do not require roof penetrations.
Next, connect the panels in series or parallel depending on the system design. To connect them in series, connect the positive terminal of one panel to the negative terminal of the next panel, and so on. This increases the voltage output of the system. To connect them in parallel, connect all the positive terminals together and all the negative terminals together. This increases the current output of the system.
Finally, ensure proper wiring by securely connecting the panels to the charge controller and inverter. Use appropriately sized cables and connectors that are rated for outdoor use and can handle the maximum current of the system. Secure the panels in a sturdy manner to prevent any movement or damage, especially in areas prone to strong winds or extreme weather conditions.
Step 5: Install batteries
To connect the batteries to the charge controller, carefully follow the manufacturer’s instructions for proper wiring and connections. Ensure that you place the batteries in a well-ventilated and secure location. This will help prevent any damage and ensure efficient functioning of the system. It is important to adhere to these instructions for correct installation and safe operation.


Step 6: Install the charge controller
Connect the charge controller to the solar panels and batteries. Ensure proper wiring by following the instructions provided by the manufacturer. Set the appropriate charging parameters on the controller for optimal performance.
Step 7: Install the inverter
To connect the inverter to the batteries and electrical system, first, locate the positive and negative terminals of the batteries. Then, connect the positive terminal of the inverter to the positive terminal of the battery and the negative terminal of the inverter to the negative terminal of the battery. Ensure secure connections by tightening the bolts or clamps.
Next, follow the manufacturer’s instructions to connect the inverter to the electrical system in your home or desired location. This may involve connecting the inverter to a main circuit breaker or distribution panel. Use appropriate cables and connectors as specified by the manufacturer.
Once all connections are made, it is crucial to test the inverter to ensure it is functioning correctly. Turn on the inverter and verify that it is supplying power to the connected devices or appliances. Conduct a thorough check to confirm that there are no loose connections, strange noises, or abnormal readings. If any issues are detected, consult the manufacturer’s troubleshooting guide or seek professional assistance.
Example:
- Connect the positive terminal of the inverter to the positive terminal of the battery, and the negative terminal of the inverter to the negative terminal of the battery. Tighten the bolts securely.
- Follow the manufacturer’s instructions to connect the inverter to the main circuit breaker. Use the specified cables and connectors.
- Turn on the inverter and check if it provides power to the connected devices. Ensure there are no loose connections or unusual behavior.
Remember to always refer to the manufacturer’s instructions for detailed guidance on wiring and connections.
Step 8: Connect the wiring
- Connect the wiring between the various components of the off-grid power system.
- Make sure to properly size and insulate the wires to ensure efficient and safe operation of the system.
- Use appropriate connectors that are compatible with the wire size and type.
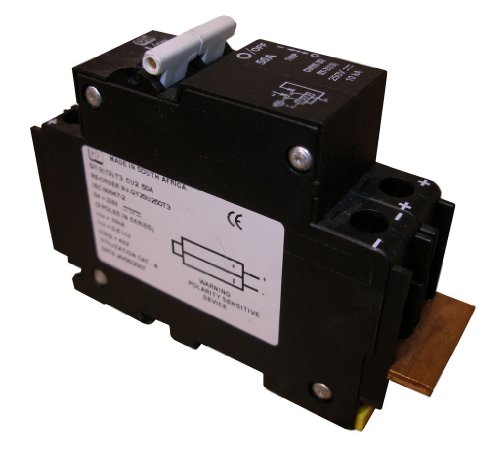
- Follow safety guidelines and regulations when working with electrical wiring.
- Before connecting the wires, turn off the power source to avoid any potential electrical shock.
- Use wire strippers to remove the insulation from the ends of the wires.
- Insert the stripped ends of the wires into the appropriate connectors and secure them tightly.
- Double-check all connections to ensure they are secure and the wires are properly aligned.
- Once all the wiring connections have been made, turn on the power source and test the system for functionality.
- If there are any issues or if the system is not working as expected, double-check all the wiring connections and consult the user manual or a professional electrician for assistance.
Step 9: Test and troubleshoot
To test the entire off-grid power system, follow these steps:
- Check all connections: Ensure that all components of the power system are properly connected. Inspect the wiring and connections for any loose or damaged parts.
- Measure voltage and current: Use a multimeter to measure the voltage and current at various points in the system. Check the voltage output of the solar panels, the battery bank, and the inverter. Verify that the readings are within the expected range.
- Test the load capacity: Connect different loads to the system to test its capacity. Start with smaller loads and gradually increase the load to see how the system handles it. Monitor the voltage and current to ensure they remain stable.
- Check for errors or malfunctions: Look for any warning lights, error codes, or unusual behaviors from the system components. Refer to the user manuals for troubleshooting guidance specific to your equipment. Address any issues promptly.
- Make adjustments if necessary: If any issues are identified during the testing process, make the necessary adjustments to rectify them. This may include fine-tuning the charge controller settings, repositioning solar panels for optimal sunlight exposure, or replacing faulty components.
- Retest for optimal performance: After making adjustments, repeat the testing process to ensure that the system now performs optimally. Verify that all components are functioning properly, the voltage output is stable, and the system meets the desired load requirements.
By following these steps, you can thoroughly test and troubleshoot your off-grid power system to ensure it is functioning correctly and efficiently.
Key Takeaways
In conclusion, we have learned that wiring an off-grid power system is a task that demands careful planning, proper component selection, and precise installation. By following the step-by-step instructions outlined in this blog post, you will be equipped to create a reliable and efficient off-grid power system that aligns with your specific electrical needs. It is our hope that this guide has provided you with valuable insights and knowledge to successfully undertake this project. Happy wiring!
Necessary Equipment