In this step-by-step guide, we will show you how to protect solar cables from weather conditions. Solar cables are an essential component in solar energy systems, responsible for transferring electricity from the solar panels to the inverter. However, exposure to weather conditions such as rain, sun, and extreme temperatures can lead to damage and reduce their effectiveness. This guide will provide you with practical tips and techniques to help ensure the longevity and optimal performance of your solar cables in any weather conditions.
Top-rated solar cables for your needs


Step 1: Choose the right type of solar cables
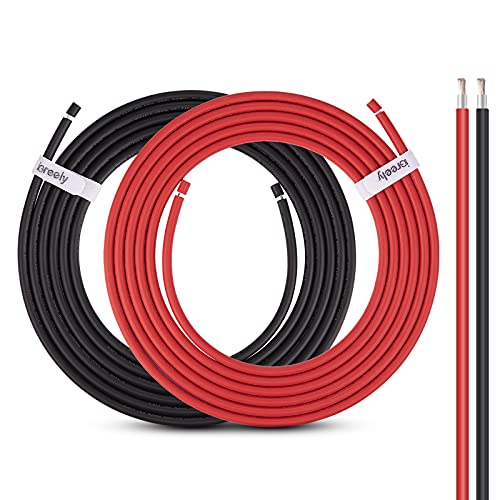
When selecting solar cables, it is important to choose ones that are specifically designed for outdoor use and can withstand various weather conditions. Look for cables that have weather-resistant insulation, as they will provide an added layer of protection against moisture and temperature fluctuations. This is crucial because solar installations are exposed to rain, snow, and other environmental factors. For example, you might consider using cables with a polyethylene (PE) or cross-linked polyethylene (XLPE) insulation, as they have excellent resistance to moisture and can handle a wide range of temperatures.
In addition to weather resistance, it is also essential to choose solar cables that are UV resistant. The cables used in solar installations are often exposed to sunlight for prolonged periods. Without UV resistance, the insulation of the cables may deteriorate over time, leading to a decrease in performance and potentially causing safety hazards. One example of a UV-resistant cable is the ethylene propylene diene monomer (EPDM) insulation, which offers excellent resistance to UV rays and can withstand long exposure without degradation.
By selecting solar cables with weather-resistant insulation and UV resistance, you can ensure the longevity and performance of your solar installation. Remember to check the product specifications and consult with professionals if needed to ensure that the chosen cables are suitable for your specific solar system requirements.


Step 2: Proper installation and routing of cables
To ensure proper installation and routing of solar cables, there are several factors to consider. First and foremost, it is essential to minimize the exposure of the cables to harsh weather conditions. This can be achieved by avoiding areas prone to excessive heat, direct sunlight, or moisture. Placing the cables in such areas can degrade their performance and compromise their longevity.
Here are some important instructions to follow when installing and routing solar cables:
- Select an appropriate location: Choose a suitable location for routing the cables that is away from extreme weather conditions. This could be inside protective conduits, underground, or within dedicated cable trays.
- Keep a safe distance: When routing the cables, ensure they are placed at a safe distance from heat sources such as equipment, machinery, or heat-emitting materials.
- Avoid sharp bends: Do not make sharp bends in the cables as this may damage them and affect their efficiency. Use gentle, gradual curves instead.
- Secure the cables: Use appropriate fasteners, clips, or brackets to secure the cables along their routing path. This will prevent them from being dislodged or getting tangled.
- Label the cables: Properly label each cable to ensure easy identification during installation, maintenance, or troubleshooting.
By following these guidelines, you can minimize the risk of weather-related damage to your solar cables and ensure the smooth operation of your solar power system.


Step 3: Use cable management accessories
Utilize cable management accessories to ensure the proper installation and protection of the solar cables. Cable clips, ties, and conduit are essential in organizing the cables neatly and preventing any damage caused by external elements. To begin, place cable clips along the desired path of the cables, ensuring they are evenly spaced and securely fastened. The clips should be positioned in a way that keeps the cables elevated and prevents them from dangling or being exposed to potential hazards.
Next, use cable ties to bundle and secure the cables together. Start by gathering the cables into a neat bundle, and then wrap the cable tie around them, pulling it tight. Trim any excess length from the tie to ensure a clean and tidy appearance. It is important to periodically check the tightness of the cable ties, as environmental factors such as temperature changes may cause them to loosen over time.
Lastly, consider using conduit to provide an extra layer of protection for the solar cables. Conduit is a flexible or rigid tube that encloses and shields the cables from physical damage, moisture, and UV exposure. Measure and cut the conduit to the appropriate length, allowing ample space for the cables to fit comfortably inside. Secure the conduit to the mounting surface using appropriate brackets, and thread the cables through it. Make sure the conduit is securely fastened and properly sealed to ensure the cables are fully protected.
By utilizing cable management accessories such as cable clips, ties, and conduit, you can organize and secure your solar cables effectively. These accessories not only ensure a neat and professional installation but also protect the cables from potential damage caused by environmental factors or external elements.


Step 4: Regular inspection and maintenance
Regularly inspect the solar cables for signs of wear, damage, or degradation. This step is crucial to maintaining the efficiency and safety of your solar system. To inspect the cables, follow these instructions:
- Start by visually examining the cables for any visible signs of wear, such as fraying or exposed wires.
- Check for physical damage, such as cuts, abrasions, or kinks in the cables.
- Look for any discoloration, which can indicate overheating or degradation.
- Inspect the connectors at both ends of the cables to ensure they are securely connected and free from corrosion or dirt buildup.
If you notice any issues with the solar cables during inspection, it is important to take immediate action. Examples of the necessary steps you should take include:
- If you find a damaged cable, remove it from the system and replace it with a new cable. This will prevent any further damage and ensure the safe operation of your solar system.
- In the case of a frayed cable, cut off the damaged portion and re-terminate it with a suitable connector. This will help maintain a secure connection and prevent any safety hazards.
- If you detect any signs of overheating or degradation, it is recommended to contact a professional for further assessment. They will be able to determine the cause of the issue and provide appropriate solutions to prevent any damage to the system.
By regularly inspecting the solar cables and addressing any issues promptly, you ensure the longevity and effectiveness of your solar system.


Step 5: Implement additional protective measures
To further enhance the protection of your cables, consider implementing additional measures such as installing cable trays or using cable jackets. Cable trays are metal or plastic structures that provide a secure and organized pathway for cables. They can be mounted on walls or ceilings, making it easier to manage and inspect the cables. Cable trays also protect the cables from physical damage, such as accidental impacts or environmental hazards.
Here are some steps to follow when implementing cable trays:
- Determine the cable tray type: Assess your requirements and choose between different types of cable trays, such as ladder, solid bottom, or wire mesh trays, based on the specific needs of your installation.
- Plan the cable pathway: Determine the best route for the cable trays, considering factors like accessibility, cable lengths, and any potential obstacles.
- Mark the measurements: Measure and mark the location of mounting brackets or supports to ensure proper alignment and spacing of the cable trays.
- Install the cable trays: Attach the mounting brackets or supports to walls or ceilings, and then carefully mount the cable trays onto them. Ensure that the trays are securely fastened and aligned according to your planned pathway.
- Organize the cables: Carefully route the cables within the cable trays, ensuring they are properly seated and supported. Use appropriate cable ties or clips to secure the cables in place.
Alternatively, another protective measure is to use cable jackets for added insulation and protection against weather conditions. Cable jackets are coverings made of durable materials, such as polyvinyl chloride (PVC) or polyethylene (PE), that shield the cables from external elements. Here’s what you can do when using cable jackets:
- Assess cable types: Determine the type of cable that requires additional protection and choose a compatible cable jacket material accordingly.
- Prepare the cables: Clean and inspect the cables to ensure they are free from any dirt or debris that may hinder the installation of the cable jackets.
- Cut the cable jacket: Measure the length of the cable that needs to be covered and use appropriate tools, like cable jacket removal tools or a knife, to carefully cut the jacket to the required length.
- Install the cable jacket: Slide the cable jacket over the cable, ensuring a snug fit without constricting the cable’s movement. Ensure that the cable jacket covers the entire length of the cable that requires protection.
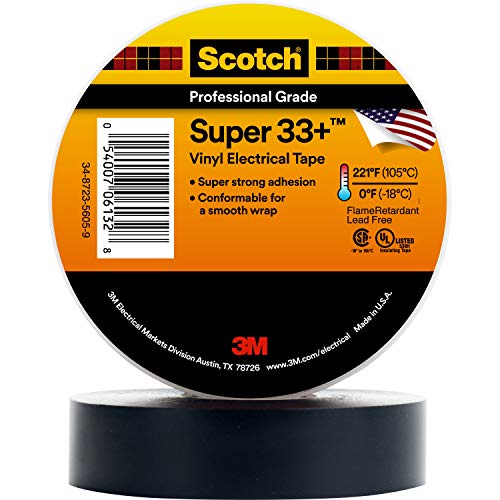
- Secure the cable jacket: Use cable ties, heat-shrink tubing, or self-adhesive tape to secure the cable jacket at both ends, ensuring it remains in place and does not slide or peel off.
By implementing cable trays or using cable jackets, you can enhance the insulation and protection of your cables against adverse weather conditions and physical damage.


Key Takeaways and Final Thoughts
In conclusion, we have learned that protecting solar cables from weather conditions is vital for maintaining the reliability and performance of a solar system. By implementing the recommended measures and taking necessary precautions, we can greatly increase the durability and efficiency of our solar cables.
Necessary Tools and Materials