


In this step-by-step guide, we will show you how to position a solar charger for maximum sunlight exposure. The purpose of this guide is to help you optimize the performance of your solar charger by ensuring that it receives the maximum amount of sunlight throughout the day. By following these simple steps, you can maximize the charging efficiency of your solar charger and prolong the battery life of your devices. Let’s get started!
Top Solar Chargers for Portable Devices


Determining the ideal location
Identifying the area where you want to position the solar charger is crucial to ensure optimal performance. First, survey your surroundings and look for an open space that receives direct sunlight exposure for a significant part of the day. This can be a garden, yard, rooftop, or any open area that is not obstructed by trees, buildings, or other objects. Avoid shady spots as they can significantly decrease the efficiency of your solar charger.
For example, position the solar charger on your rooftop if it is free from shadows caused by nearby buildings or trees. The roof usually offers a wide and unobstructed area that is exposed to sunlight for most of the day. Alternatively, you can set up the solar charger in an open garden or install it on a standalone pole in your yard, provided these locations also receive ample direct sunlight. Remember, the more sunlight the solar charger receives, the more energy it can harness.
By considering these factors and choosing a location with direct sunlight exposure, you will ensure that your solar charger operates optimally and efficiently throughout the day. So, take a quick walk around your property and find the perfect spot for harnessing the power of the sun.


Optimal angle adjustment
Adjust the tilt of your solar charger to the optimal angle for maximum sunlight absorption. Start by consulting the user manual or online resources specific to your charger to determine the recommended angle for your geographical location. This information will help you get the most out of your solar charger.
To tilt the solar charger, locate the angle adjustment mechanism, usually located at the back or bottom of the charger. Using your hands or appropriate tools, loosen the adjustment screws or levers to allow for movement. Gradually tilt the solar charger to the suggested angle, taking care not to force or overextend the mechanism. Once you have achieved the desired angle, tighten the screws or levers to secure the position. Regularly check the angle and make necessary adjustments throughout the year to optimize sunlight absorption. Remember, the optimal angle for solar charging varies depending on your location, so it is crucial to consult the user manual or online resources for accurate information.


Tracking the sun's path
Track the sun’s movement throughout the day by regularly observing its position in the sky. Start by placing the solar charger in an open, unobstructed area where it can receive direct sunlight. Monitor the position of the sun periodically, preferably every hour or two, to ensure that the charger remains in optimal exposure.
If you notice that the sun has moved and the charger is no longer directly facing it, it is time to adjust the position of the charger. Gently tilt or reposition the charger to align it with the sun’s current path. This will help maximize the amount of sunlight absorbed by the solar panels and optimize the charging efficiency.
Keep in mind that some solar chargers come equipped with built-in tracking mechanisms. These mechanisms automatically adjust the charger’s position to follow the sun throughout the day. If your solar charger has this feature, make sure it is activated and functioning properly. This will eliminate the need for manual adjustment, ensuring continuous exposure to direct sunlight and consistent charging performance.


Avoiding obstructions
When it comes to maintaining the efficiency of your solar charger, it is crucial to regularly check for any obstructions that may arise. Leaves, dust, or debris can accumulate on the surface of the charger, blocking sunlight and reducing its ability to generate electricity. To prevent this, we recommend cleaning the solar charger’s surface on a regular basis. Start by wiping off any loose debris using a soft cloth or brush. Next, dampen the cloth with water and gently wipe the surface to remove any stubborn dirt or grime. This will ensure maximum sunlight penetration and optimize the performance of your solar charger.
To summarize, here are the steps to follow in maintaining a clear solar charger surface:
- Wipe off any loose debris with a soft cloth or brush.
- Dampen a cloth with water and gently wipe the surface to remove dirt or grime.Remember to perform these cleaning steps periodically, especially after periods of heavy rainfall or when the charger is exposed to a dusty environment. By keeping your solar charger free from obstructions, you can ensure it continues to generate clean and renewable energy efficiently.


Consider using a solar tracker
Consider using a solar tracker if you want to optimize sunlight exposure. Solar tracker devices are designed to automatically adjust the position of the solar charger to track the sun’s movement and maximize sunlight absorption. To get started, first, research and choose a reliable solar tracker device that suits your needs. Look for features such as durability, efficiency, and ease of installation.
Next, follow the manufacturer’s instructions to mount the solar tracker onto a sturdy base that can withstand environmental conditions. Make sure the solar tracker is securely fastened and positioned in an area with unobstructed access to direct sunlight. Connect the solar tracker to your solar panel system, following the provided wiring diagrams and instructions.
Once the solar tracker is installed, it will automatically adjust the angle and direction of the solar panel throughout the day to follow the sun’s movement. This means that the solar panel will continuously be positioned to receive maximum sunlight, resulting in improved energy production. Regularly monitor the solar tracker’s performance and make any necessary adjustments if needed. Remember to consult the manufacturer’s documentation for maintenance and troubleshooting tips to ensure optimal functionality.
Using a solar tracker can greatly enhance the efficiency of your solar panels and maximize their energy output by capturing as much sunlight as possible. By investing in a solar tracker, you can take advantage of the sun’s movement and optimize the energy absorption of your solar panel system.

Optimizing solar panel positioning
In conclusion, positioning a solar charger for maximum sunlight exposure is crucial for its efficiency and effectiveness. Throughout this guide, we have discussed several key factors to consider. First and foremost, selecting an ideal location is essential, ensuring that the solar charger receives ample sunlight throughout the day. Additionally, adjusting the angle of the charger to match the latitude of your location will optimize its performance. Tracking the sun’s path and adjusting the charger’s position accordingly will further enhance sunlight exposure. It is also important to avoid any obstructions that may cast shadows on the charger. Lastly, for those seeking optimal sunlight exposure, considering a solar tracker can significantly improve the charger’s performance by constantly adjusting its position to face the sun. By implementing these key points, we can make the most of our solar chargers and harness the power of the sun efficiently.
Necessary Supplies


Optimizing Solar Charger Placement
Step-by-Step Guide on Using Solar Chargers for Portable Devices
- First, ensure that the solar charger is fully charged by placing it under direct sunlight for several hours. This will ensure that it has enough power to charge your devices
- Next, connect your portable device to the solar charger using a suitable charging cable. Most solar chargers come with multiple USB ports, so you can charge multiple devices at once if needed
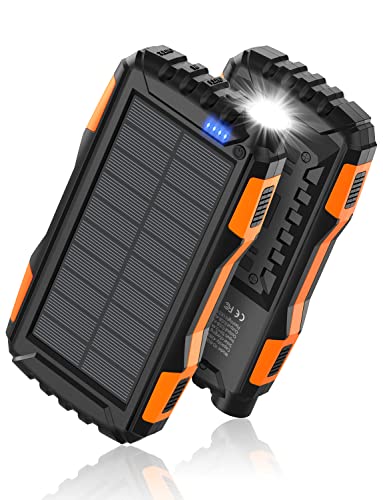
- Position the solar charger in direct sunlight. It is important to place the solar panels in direct sunlight to maximize the charging efficiency. Some solar chargers also have adjustable stands or hooks, allowing you to position them at the perfect angle for optimal sunlight exposure
- Monitor the charging progress. Many solar chargers have LED indicators or digital displays that show the current battery level or charging status. Keep an eye on these indicators to ensure your devices are charging as intended
- Be patient and allow sufficient time for charging. Solar charging is generally slower than traditional wall chargers, especially when there is limited sunlight. It may take a few hours or even a full day to fully charge your device. Therefore, it is recommended to start charging well in advance or keep the solar charger connected to your device during the day while you are outdoors
- Remember that the performance of a solar charger heavily depends on the amount of sunlight available and the quality of the charger itself. Additionally, make sure to read the instruction manual that comes with your specific solar charger model for any additional guidelines or recommendations