


In our step-by-step guide, “How to Perform Regular Propane Generator Maintenance for Optimal Performance,” we understand the importance of propane generators for off-grid living. We all rely on these generators to provide power when we don’t have access to the electrical grid. Therefore, it’s crucial to ensure their optimal performance by performing regular maintenance. This guide walks you through the necessary steps to keep your propane generator running smoothly, so you can continue enjoying a reliable power source for all your off-grid needs.
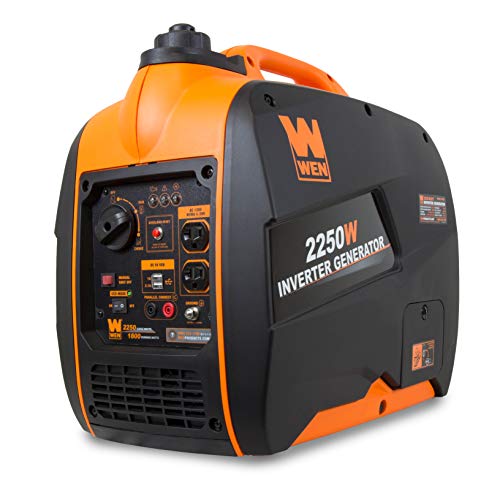
Top-Rated Propane Generators for Off-Grid Living

Gather the necessary tools and materials
Before starting the propane generator maintenance process, gather the necessary tools and materials:
- Propane generator manual
- Gloves
- Safety glasses
- Clean cloth
- Wrench set
- Spark plug socket
- Oil filter wrench
- Fuel stabilizer
- New spark plugs if needed
Having these items on hand will ensure you have everything you need to safely and efficiently perform the maintenance tasks. The propane generator manual will provide crucial information and instructions specific to your generator model. Gloves and safety glasses will protect your hands and eyes from any potential hazards. The clean cloth can be used for wiping off any dirt or debris. The wrench, spark plug socket, and oil filter wrench will be essential for removing and replacing parts. Fuel stabilizer should be used to maintain the quality of the fuel over time. Lastly, having new spark plugs available will allow you to replace them if necessary for optimal performance.


Turn off the propane generator
To successfully turn off a propane generator, follow these steps:
- Locate the generator’s on/off switch or shut-off valve: This switch or valve is usually found near the generator’s control panel or on the fuel tank. Look for a clearly marked switch labeled “on/off” or a valve that can be turned.For example: If you have a portable propane generator, the on/off switch is typically located on the control panel, close to where the start and stop buttons are located. On the other hand, if you have a larger standby generator, the shut-off valve can usually be found near the fuel tank, either on the supply line or the tank itself.
- Turn off the switch or valve: Depending on the generator model, you may need to either flip the switch to the “off” position or turn the valve clockwise to shut off the propane supply.For example: If your generator has an on/off switch, simply flip it from the “on” position to the “off” position. If it has a shut-off valve, use a wrench or your hand to turn it clockwise until it stops.
By following these steps, you will be able to locate the on/off switch or shut-off valve and safely turn off the propane generator before conducting any maintenance or repairs. Remember to always refer to the specific instructions provided by the manufacturer for your particular generator model.
Let the generator cool down
When it comes to maintaining your generator, it is crucial to exercise caution and prioritize safety. After using the generator, allow it to cool down completely before attempting any maintenance tasks. This will reduce the risk of any accidental burns or injuries. For instance, if you have been using the generator for an extended period of time, the engine will be hot. Waiting for it to cool down will ensure you can safely access and inspect various components without the risk of burns or other mishaps.


Inspect and clean the air filter
To inspect and clean the air filter, begin by removing the air filter cover. Look for any dirt, debris, or damage on the air filter itself. For instance, you might notice particles of dust or leaves stuck to the filter. If you find the filter dirty, use compressed air to blow out the dirt. Alternatively, if the filter is damaged or excessively dirty, it’s best to replace it with a new one.
Check and change the oil
To locate the oil dipstick or oil cap and check the oil level, first, open the hood of your car. Look for the oil dipstick, which is usually a brightly colored handle, or the oil cap, which is typically labeled “Oil” or “Engine Oil.” Pull out the dipstick or unscrew the oil cap, and wipe it clean with a rag or tissue. Reinsert the dipstick all the way back in or put the oil cap back on, and then pull it out again to check the oil level. If the oil level is low, add the recommended type and amount of oil. To drain and replace dirty or old oil, make sure the engine is cool and place a drain pan underneath the oil drain plug, which is typically located on the bottom of the engine. Unscrew the plug with a wrench and let the oil drain completely. Once drained, replace the drain plug and use a funnel to pour in the appropriate amount of fresh oil of the recommended type.

Inspect and clean the spark plug
To inspect and clean the spark plug, follow these steps:
- Use a spark plug socket to remove the spark plug from the engine. For example, twist the socket counterclockwise to loosen and remove the spark plug.
- Inspect the spark plug for any signs of damage or wear. Look for cracks, fouling, or excessive carbon buildup on the electrode. For instance, if you notice worn electrodes or a damaged insulator, it’s time to replace the spark plug.
- If the spark plug appears dirty or fouled, clean it using a wire brush. Gently scrub the electrode and the insulator to remove any dirt, oil, or carbon deposits. Remember to be careful not to damage the delicate parts of the spark plug.
- If the spark plug cannot be effectively cleaned or if it is damaged beyond repair, it’s best to replace it with a new one. Ensure you choose the correct spark plug for your particular engine model to ensure optimal performance.
Regularly inspecting and cleaning the spark plug helps maintain efficient combustion and reliable engine performance.
Inspect and clean the fuel system
To inspect and clean the fuel system, first, check the fuel lines, filter, and tank for any signs of leaks, blockages, or damage. Look for cracks, holes, or loose connections. If you find any issues, they should be addressed immediately. Next, clean or replace the fuel filter if necessary. Over time, filters can become clogged with dirt and debris, so it’s important to ensure proper fuel flow. Finally, make sure the fuel tank is clean and free of any debris. Use a clean cloth or sponge to wipe away any dirt or residue that may have accumulated inside. By following these steps, you can maintain the efficiency and functionality of your fuel system.
Check the battery
To check the battery, follow these steps:
- Inspect the battery terminals: Check for any signs of corrosion or loose connections. Corrosion can appear as a white powdery substance on the terminals. Loose connections may result in a weak or no electrical connection.
Example: Look for any white substance or buildup around the battery terminals.
- Clean the terminals: If there is corrosion present, clean the terminals to ensure a good electrical connection. Use a solution of baking soda and water or a battery terminal cleaner to remove the corrosion. Scrub the terminals gently with a wire brush or an old toothbrush to clean off any residue.
Example: Mix one tablespoon of baking soda with one cup of water to create a cleaning solution.
- Ensure a tight connection: After cleaning the terminals, make sure they are tightly secured. Ensure that the battery cables are snugly attached to the terminals. Loose connections can cause poor performance or a failure to start.
Example: Use a wrench or pliers to tighten the nuts on the battery terminals.
- Consider battery replacement: If the battery is old or not holding a charge despite proper maintenance, it may be time to replace it. A weak battery can result in difficulties starting the vehicle or even cause electrical issues.
Example: If the battery is more than 3-4 years old or frequently requires a jumpstart, it is likely time for a replacement.
Regularly checking the battery and ensuring it is in good working condition can help prevent unexpected breakdowns and prolong the life of the battery.
Start the propane generator and test
To start the propane generator and test its functionality, follow these clear and easy-to-follow instructions:
- Turn on the propane supply: Ensure that the propane tank is properly connected and the valve is open. This allows the generator to access the fuel it needs to operate.
- Prime the fuel system (if necessary): Some generators may require priming to eliminate air in the fuel system. Consult the generator’s manual to determine if priming is necessary, and follow the specified procedure if so.
- Set the choke: If the generator has a choke, switch it to the appropriate position based on the temperature conditions. Chokes help regulate the air-fuel mixture for smooth starting and running.
- Pull the starter cord or press the electric start button: This initiates the generator’s engine. Use a firm and smooth motion to pull the starter cord or press the electric start button until the engine starts running.
- Let the generator run for a few minutes: Allow the generator to idle for a few minutes to warm up. During this time, observe the generator to ensure it operates smoothly and does not emit any unusual sounds or smoke.
- Check power output: With the generator running, connect a device such as a lamp or fan to one of the generator’s power outlets to test if it functions properly. Confirm that the connected device receives the expected power output, indicating that the generator is generating electricity as intended.
By following these steps, you can successfully start the propane generator and perform a simple test to verify its smooth operation and power output.
Key Takeaways
In conclusion, performing regular propane generator maintenance is crucial for ensuring optimal performance and longevity of your equipment. Throughout this guide, we have highlighted the key steps involved in maintaining your propane generator, such as cleaning and inspecting components, checking fluid levels, and testing the system. By adhering to these maintenance practices, you can prevent potential issues, such as decreased output, increased fuel consumption, or even costly repairs. By investing a small amount of time and effort into regular propane generator maintenance, you can rely on your equipment to provide reliable power when you need it most. So, let’s prioritize proactive maintenance to keep our propane generators running smoothly for years to come.
Necessary Equipment


