In this step-by-step guide, we will walk you through the process of installing solar-powered lighting. Solar-powered lighting is an eco-friendly and cost-effective solution for illuminating outdoor areas such as gardens, pathways, and patios. It harnesses the power of the sun to generate electricity that is then used to light up the surroundings. This how-to guide will provide you with clear instructions and tips on how to install solar-powered lighting system, ensuring that you can enjoy the benefits of sustainable lighting in your outdoor space.
Top Solar-powered Lighting Choices
Step 1: Assessing the location
To determine the ideal location for installing solar-powered lighting, there are several factors to consider. Follow these steps to ensure a successful assessment:
- Sunlight exposure: Identify areas with maximum sunlight exposure throughout the day. Look for locations that are free from shade and obstructions such as tall buildings, trees, or hills. For example, a rooftop or an open field can be great options.
- Obstructions: Take note of any potential obstructions that may affect the efficiency of the solar panels. These can include nearby objects, such as buildings or trees, that might cast shadows over the panels and reduce the amount of sunlight they receive. Ensure that the chosen location is free from significant obstructions.
- Safety: Safety is paramount when installing solar-powered lighting. Choose a location that is easily accessible, well-lit, and secure. Consider any potential risks, such as potential vandalism or accidents. Opt for areas that are visible and have minimal chances of unwanted interference.
By carefully assessing these three key factors – sunlight exposure, obstructions, and safety – you can determine the ideal location for installing solar-powered lighting. Remember to prioritize areas with ample sunlight, minimal obstructions, and high safety standards for optimal performance and longevity of your solar-powered lighting system.
Step 2: Selecting the lighting system
When selecting a lighting system, it is crucial to consider your specific needs and requirements. To choose the appropriate solar-powered lighting system, take into account factors such as brightness, run time, and weather resistance. Here are a few tips to help you make an informed decision:
- Determine the required brightness: Consider the area you need to illuminate and the level of brightness required. Look for lighting systems with adjustable brightness settings to cater to your specific lighting needs.
- Estimate the run time: Assess how long you need the lights to operate each night. Check the product specifications for information on the battery capacity and the estimated run time at different brightness levels. This will help you select a lighting system that meets your run-time requirements.
- Consider weather resistance: Depending on the location and climate, it is important to choose a lighting system that can withstand harsh weather conditions. Look for products that are IP65 or IP66 rated, indicating they are dustproof and waterproof, making them suitable for outdoor use.
For example, a solar-powered floodlight with adjustable brightness, a long run time of up to 12 hours, and a waterproof rating would be ideal for illuminating a large outdoor area throughout the night. On the other hand, a smaller garden light with a shorter run time and basic weather resistance may be sufficient for lighting up a small patio or pathway.
Remember to carefully evaluate your needs and prioritize the factors that are most important to you when selecting the appropriate solar-powered lighting system.
Step 3: Gathering the necessary tools and materials
To successfully gather all the necessary tools and materials for the installation, follow these steps:
- Make a list: Start by creating a comprehensive list of all the items you will need, including the solar panels, batteries, light fixtures, wiring, and mounting hardware.
- Check your current inventory: Before purchasing anything, review your existing inventory and see if you already have some of the required tools or materials. This will help you avoid unnecessary expenses.
- Purchase the required items: Once you have identified what you need, visit your local hardware store or browse online to purchase the necessary tools and materials. Examples of specific items you may require include:
- Solar panels: Depending on your energy needs, choose the appropriate number and wattage of solar panels. For instance, a small residential setup might require 10-12 panels with a total wattage of 3,000W.
- Batteries: Determine the capacity and type of batteries suitable for storing the energy generated by the solar panels. Common choices include deep cycle batteries and lithium-ion batteries.
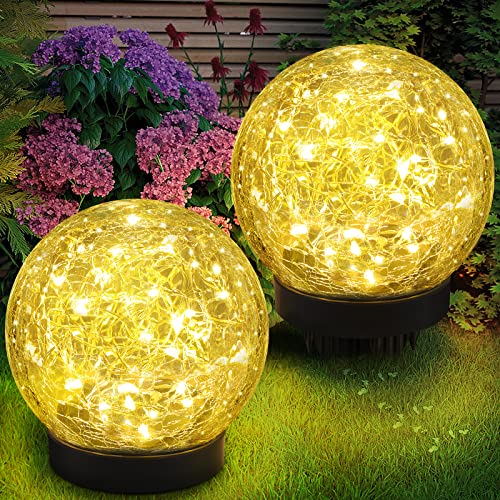
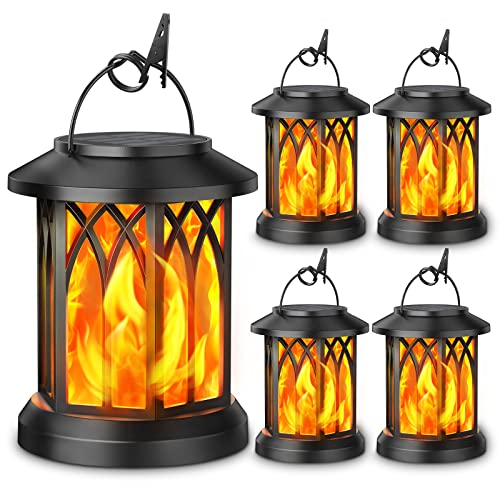
- Light fixtures: Select the desired type and number of light fixtures you wish to install. You can choose between LED lights, tube lights, or floodlights, depending on your requirements.
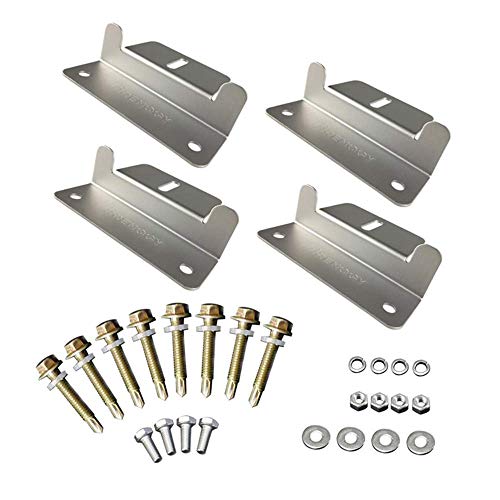
- Wiring and mounting hardware: Ensure you have enough wiring to connect the solar panels, batteries, and light fixtures. Additionally, gather all the necessary mounting hardware, such as brackets and screws, to securely install the panels and fixtures.
By thoroughly preparing and collecting all the required tools and materials beforehand, you will save time and ensure a smooth installation process.
Step 4: Preparing the installation area
To prepare the installation area for the best results, follow these steps:
- Clear any obstructions from the area where the installation will take place.
- Level the ground using a rake or shovel to create a smooth surface. If necessary, add soil or remove excess soil to ensure an even foundation for the installation.
- Make sure the area is clean and free from debris such as leaves, twigs, or any other objects that may interfere with the installation process.
- Remember to double-check the quality of the installation area to ensure a seamless and durable outcome.
Step 5: Installing the solar panels
To mount the solar panels, first locate a position with maximum sunlight exposure on your roof or any other suitable location. Make sure to follow the manufacturer’s instructions for proper installation. Secure the panels firmly in place to ensure stability and optimal performance.
Step 6: Connecting the wiring
To connect the wiring, begin by connecting the solar panels to the batteries. Make sure you follow the wiring diagram that comes with the lighting system. This will ensure that the correct connections are made. Once the solar panels are connected to the batteries, proceed to connect the batteries to the light fixtures. Follow the diagram to ensure that the wiring is correctly connected, allowing the flow of electricity from the panels to the batteries, and then to the light fixtures.
Step 7: Mounting the light fixtures
To securely mount the light fixtures, follow these instructions:
- Position the light fixtures in the desired locations, making sure they are aligned according to your lighting layout plan.
- Use a pencil or marker to mark the mounting holes on the wall or ceiling where the fixtures will be installed.
- Drill pilot holes into the marked spots using an appropriate drill bit, ensuring the holes are slightly smaller than the screws or anchors you will be using.
- Place the fixture over the pilot holes, aligning the mounting bracket with the drilled holes.
- Insert the screws or anchors into the pilot holes and use a screwdriver or drill to firmly fasten the fixture onto the wall or ceiling.
- Double-check the fixture’s stability by gently shaking or pushing on it to ensure it is securely attached.
- Repeat these steps for each light fixture, ensuring they are evenly spaced and properly positioned.
By following these steps, you will be able to securely mount your light fixtures in the desired locations, ensuring proper positioning and a tight fit.
Step 8: Testing the system
To test the solar-powered lighting system, switch it on and proceed to test each light fixture individually. Check if all the lights are functioning properly and adjust any settings if needed. This will ensure that the system is working as intended and that each light fixture is providing the required illumination.
Step 9: Securing the wiring
To secure the wiring, begin by fastening it carefully to the proper locations using clips or clamps. Next, cover the wiring with conduit or protective tubing. Ensure that the conduit or tubing is the appropriate size and material for your specific application. This step is essential to protect the wiring from damage and maintain a neat and organized appearance.
Step 10: Regular maintenance
Regular maintenance of your solar panels is crucial to ensure they perform at their best. Here are some simple steps to keep them in optimal condition:
- Check and clean the solar panels: Inspect your solar panels regularly for any dirt, leaves, or debris that might be blocking the sunlight. Use a soft brush or a sponge with mild soap and water to gently clean the surface. Rinse thoroughly to remove any soap residue.
Example: Gently brush off any dirt or leaves from the surface of the solar panels. Use a sponge with mild soap and water to clean any stubborn stains. Rinse thoroughly with clean water to remove any soap residue.
- Inspect the wiring and connections: Examine the wiring and connections to ensure they are tightly secured and free from any signs of damage or wear. Look out for loose or corroded connections, exposed wires, or any other visible issues that might affect the performance of your solar panels.
Example: Carefully inspect all the wiring and connections, ensuring they are tightly secured and free from any signs of damage or wear. Check for loose or corroded connections, exposed wires, or any other visible issues that might affect the performance of your solar panels.
By regularly checking and cleaning your solar panels, as well as inspecting the wiring and connections, you can help maintain their efficiency and prolong their lifespan. Taking these simple steps will ensure that your solar energy system continues to generate clean and renewable energy for years to come.
Summary of Installation Steps
In conclusion, we have provided a comprehensive guide on how to install solar-powered lighting. We discussed the benefits of solar lighting, the necessary materials and tools, as well as the step-by-step installation process. By following our instructions, you can enjoy the advantages of renewable energy and lower electricity costs. Remember to choose the right location for maximum sunlight exposure and ensure proper maintenance for optimal performance. Switching to solar-powered lighting is a practical and environmentally-friendly choice that can make a positive impact on both your energy consumption and the planet.


