In this step-by-step guide, we will show you how to incorporate a solar fountain pump into your garden design. A solar fountain pump is a great addition to any garden as it harnesses the power of the sun to create a beautiful and eco-friendly water feature. It not only adds aesthetic appeal to your garden but also helps promote a sustainable lifestyle. With our easy-to-follow instructions, you’ll be able to install and set up your solar fountain pump in no time, transforming your garden into a tranquil oasis powered by renewable energy.
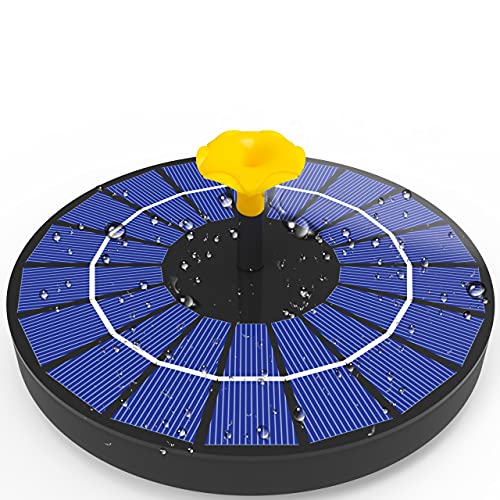
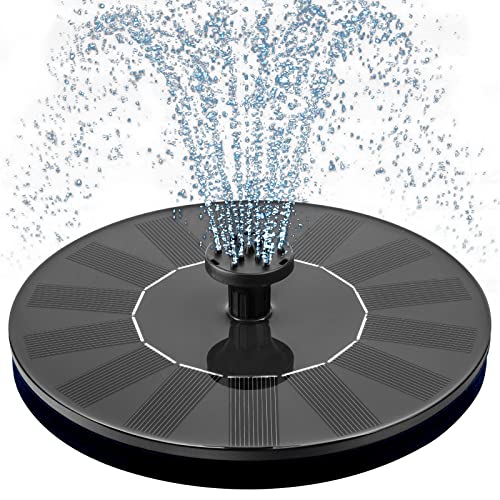
Top-selling solar fountain pumps


Choosing the Right Solar Fountain Pump
When researching and choosing a solar fountain pump for your garden, it is important to consider several factors that will ensure it suits your garden design and meets your specific requirements. To begin, determine the appropriate pump size based on the size of your fountain or pond. A larger pump may be needed for larger water features, while a smaller pump may suffice for smaller ones.
Next, consider the flow rate of the solar fountain pump. This refers to the amount of water the pump can circulate within a given time. The flow rate should be suitable for your desired water feature effect. Additionally, think about the water lift height, which is the maximum height the pump can effectively lift water. Ensure that the pump you choose can reach the desired height for your fountain or waterfall design.
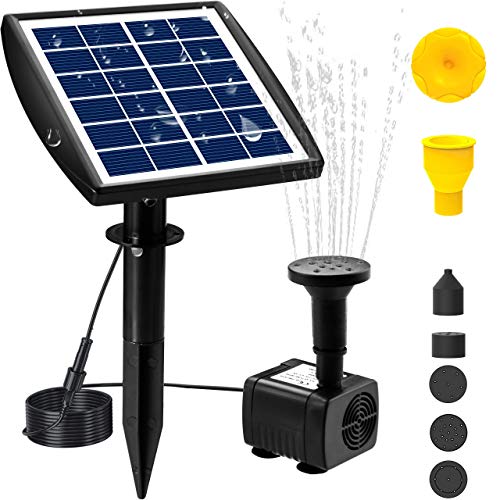
Finally, think about any additional features you may want in your solar fountain pump. These can include options like adjustable flow settings, LED lights, a battery backup for cloudy days, or a built-in filtration system. Determine which of these features are important to you and find a pump that offers them. By considering pump size, flow rate, water lift height, and any additional features, you can find a solar fountain pump that is both functional and visually appealing for your garden.
- Determine the appropriate pump size based on the size of your fountain or pond.
- Consider the flow rate, which should be suitable for your desired water feature effect.
- Think about the water lift height and ensure it can reach your desired height.
- Consider any additional features you may want such as adjustable flow settings or LED lights.


Determining the Placement of the Solar Fountain Pump
Identifying the ideal location for your solar fountain pump is crucial to ensure its proper functionality. Firstly, consider the sunlight exposure in your garden. Choose a spot that receives ample direct sunlight throughout the day, as the solar panels need this sunlight to generate power for the pump. Avoid placing the pump in shaded areas or under trees that may obstruct the sunlight. By locating it in a sunny area, you can ensure an optimal power supply for the pump.
Next, consider the accessibility to a water source. The solar fountain pump needs to be positioned close to a water source, such as a pond or a water container, for the pump to draw water effectively. This will ensure a constant water flow for your fountain. Additionally, make sure the chosen location provides easy access to the water source for maintenance and refilling purposes.
Lastly, take into account the aesthetic integration with your garden design. Select a spot that complements the overall aesthetics of your garden and enhances its visual appeal. By carefully considering the placement, you can create a harmonious balance between the solar fountain pump and the surrounding landscape.

Preparation and Installation of the Solar Fountain Pump
Prepare the site by clearing any debris and creating a stable base for the pump. Remove any leaves, dirt, or other debris that may obstruct the operation of the solar fountain pump. Carefully inspect the area to ensure there are no sharp objects or protrusions that could damage the pump. Once the area is clear, create a stable base by leveling the ground or using a suitable platform. This will ensure that the pump is securely positioned and operates efficiently.
Follow the manufacturer’s instructions to assemble and install the solar fountain pump. Begin by unpacking all the components and checking that they are in good condition. Next, carefully follow the step-by-step instructions provided by the manufacturer to assemble the pump. Make sure to correctly attach the different parts and secure them in place. Once the pump is assembled, position it in the desired location, ensuring that it aligns with the prepared site.
Connect the pump to the solar panels and position them in a way that maximizes exposure to sunlight. Consult the manufacturer’s instructions to determine the appropriate method for connecting the pump to the solar panels. Ensure that the connections are secure and that the cables are properly insulated. After connecting the pump, position the solar panels in a location where they receive ample sunlight throughout the day. This might involve adjusting the angle of the panels or placing them in a spot with unobstructed sunlight. Maximizing exposure to sunlight will optimize the performance of the solar fountain pump.


Testing and Adjusting the Solar Fountain Pump
To fill the fountain basin with water and turn on the solar fountain pump, first, locate the water inlet on the fountain basin. Use a garden hose or bucket to pour water into the basin until it reaches the desired level. Once the basin is filled, locate the power switch or button on the pump. Flip the switch or press the button to turn on the pump. Listen for the sound of running water and check that the pump is functioning properly by observing the water flowing out of the fountain nozzle.
To achieve your desired fountain effect, you may need to adjust the flow rate and water lift height. Locate the flow rate adjustment knob or lever on the pump. Gradually increase or decrease the flow rate by turning the knob or moving the lever to find the perfect balance. This will allow you to control the speed at which the water flows out of the fountain nozzle. Additionally, if your pump comes with an adjustable water lift height feature, locate the corresponding knob or lever. By adjusting this, you can control the height at which the water is pumped and thus customize your fountain effect.
Finally, it is important to make any necessary adjustments to the solar panel positioning for optimal performance. Ensure that the solar panel is facing directly towards the sun to receive maximum sunlight. This may require tilting or repositioning the panel throughout the day to track the sun’s movement. Experiment with different angles and positions until you find the optimal setup for your solar fountain pump. Remember that proper positioning of the solar panel will result in better solar charging and overall pump performance.


Maintenance and Troubleshooting
Regularly clean the pump and solar panels to remove any dirt or debris that may affect performance. Start by turning off the pump and disconnecting it from the power source. Use a soft brush or cloth to gently remove any dirt or debris from the surface of the pump and solar panels. Be sure to pay attention to any crevices or corners where dirt may accumulate. Once all the dirt is removed, use a hose or bucket of clean water to rinse off the surfaces thoroughly. Allow the pump and solar panels to dry completely before reconnecting and turning it back on.
Check the water level and ensure it is maintained at the appropriate level. First, turn off the pump and disconnect it from the power source. Look at the water level in the reservoir and ensure it is above the minimum level indicated by the manufacturer. If the water level is low, add more water until it reaches the appropriate level. Take note to use clean water that is free from any contaminants. Once the desired water level is reached, reconnect the pump and turn it back on.
Troubleshoot any issues that may arise, such as low water flow or insufficient power generation. If you notice low water flow, first check if there are any obstructions in the pipes or tubing connected to the pump. Clear any blockages by gently removing the debris or flushing the pipes with clean water. Next, inspect the pump itself for any signs of damage or wear. If necessary, replace any parts that are worn out or malfunctioning.
In the case of insufficient power generation, start by checking the solar panels for any shading or debris that may be blocking sunlight. Remove any obstructions and ensure the panels are positioned in a way that maximizes sunlight exposure throughout the day. If the panels are clean and properly positioned, it is advisable to consult a professional to further investigate and diagnose the issue.
Remember, regular maintenance and troubleshooting are essential for the optimal performance and longevity of your pump and solar panels. By following these simple steps, you can ensure that your system operates efficiently and effectively.

The Benefits of Solar Fountain Pumps
In conclusion, incorporating a solar fountain pump into your garden design can be a great way to enhance the beauty and tranquility of your outdoor space. By choosing the right solar fountain pump, determining the ideal placement, properly installing and testing it, and following a consistent maintenance routine, you can ensure optimal performance and longevity of your fountain. The key is to select a pump that suits your needs, consider the sun exposure in your garden, and regularly clean and maintain the pump. By following these guidelines, you can enjoy the benefits of a solar-powered fountain and create a stunning focal point in your garden. Happy designing!
Necessary Equipment