In our step-by-step guide “How to Design and Build Your Own Solar Water Heating System,” we provide you with the knowledge and instructions necessary to create your very own solar water heater. This guide aims to give you a clear understanding of the process and equip you with the skills needed to design and construct a practical and efficient system that can harness the power of the sun to heat your water. Whether you want to reduce your carbon footprint or save money on your energy bills, our guide will lead you through each step, from designing the system to choosing the right materials and installing it correctly. So, let’s get started on your journey to becoming more energy independent and environmentally conscious!
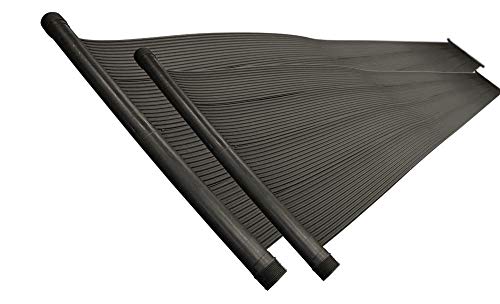
Top-rated solar water heating systems


Research and Planning
To gather information about solar water heating systems, start by researching the different types and their components. There are several types of solar water heating systems, including active and passive systems. Active systems use pumps and controls to circulate the fluid, while passive systems rely on natural convection to move the water.
Next, determine the specific requirements for your location. Consider factors such as the average daily solar radiation in your area, the orientation and tilt angle of your roof, and any shading or obstructions that may affect the performance of the system. This information will help you choose the most suitable type of solar water heating system for your needs.
Finally, calculate your water heating needs. Determine the amount of hot water you use on a daily basis and the desired temperature rise. This will help you determine the size and capacity of the solar water heating system you require.
Remember to consider your budget and any available incentives or rebates for installing a solar water heating system. Gathering all this information will enable you to make an informed decision and plan your solar water heating system effectively.


Design and Sizing
Designing a solar water heating system requires careful consideration of various factors, such as available sunlight and local climate conditions, to ensure optimal performance. To design your solar water heating system, follow these steps:
- Determine your requirements: Identify your hot water needs, including the desired daily hot water consumption and the average temperature of hot water required. This will serve as a basis for selecting the appropriate size for your solar water heating system.
- Assess available sunlight: Determine the average daily solar irradiation in your area. This information can be obtained from local weather stations or online databases. Consider factors such as shading from trees or nearby structures that may affect the available sunlight.
- Calculate the collector area: Based on the solar irradiation data from step 2, calculate the required collector area. The collector area is directly proportional to the hot water demand and inversely proportional to the solar irradiation. A rule of thumb is to allocate approximately 1 square meter of collector area for every 1-2 persons in a household.
- Size the storage tank: Determine the required storage capacity for your solar water heating system. This will depend on your daily hot water consumption and the temperature rise required. The general guideline is to have a storage tank capacity of 50-75 liters per person.
- Choose other components: Select other components such as pumps, pipes, and controls based on the specific requirements of your solar water heating system. Ensure that these components are compatible with the collector area and storage tank size calculated earlier.
Remember to consult with professionals or use online tools that provide detailed calculations for more accurate results. By following these steps, you will be able to design a solar water heating system that suits your needs and maximizes the benefits of solar energy.


Gather Materials
To create a solar water heating system, you will need to gather the necessary materials. We recommend creating a comprehensive list to ensure you have everything you need. Here are the essential components you should include:
- Solar collectors: These are the devices that collect sunlight and convert it into heat energy. There are various types available, such as flat plate collectors or evacuated tube collectors. Choose the one that best suits your needs and budget.
- Storage tanks: These tanks store the heated water for later use. Determine the size and capacity based on your household’s requirements and the amount of hot water needed.
- Pipes: You will need pipes to connect the solar collectors to the storage tank, allowing the transfer of hot water. Consider using appropriately sized, insulated pipes for maximum efficiency.
- Insulation: Insulating materials such as foam sleeves or insulation tape are essential for minimizing heat loss in the pipes. Make sure you have enough insulation to cover all the pipes connecting the components.
- Controls: These devices help regulate and monitor the system. They can include pumps, valves, temperature sensors, and controllers. Choose controls that are suitable for your specific setup.
Once you have created your materials list, it’s time to purchase or gather the components. Before making any purchases, consider comparing prices and quality from different suppliers to ensure you’re getting the best value for your money. Some items may be available at local hardware stores, while others may need to be purchased online or from specialized solar equipment suppliers. By preparing a comprehensive list and acquiring all the necessary materials, you will be ready to move on to the next steps of installing your solar water heating system.


Installation
To install the solar collectors, begin by selecting a suitable location on your roof or another area that receives ample sunlight throughout the day. Ensure that the chosen location has enough space and is free from any shading that may obstruct the solar panels. Clean the area thoroughly to remove any dirt or debris.
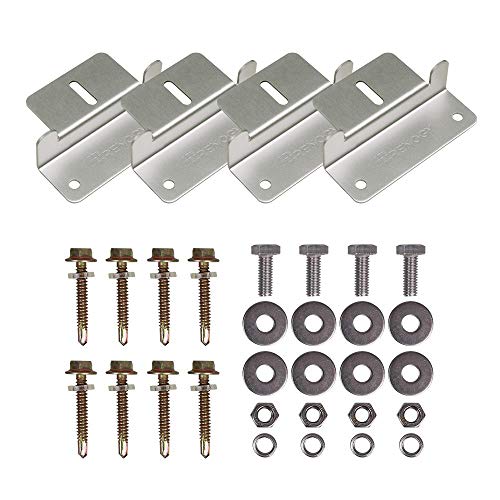
Next, securely mount the solar collectors on the chosen location using the provided mounting brackets or hardware. Ensure that they are placed at an optimal angle to maximize sunlight absorption. Follow the manufacturer’s instructions for proper installation and ensure that the collectors are firmly attached to the roof or structure.
After securing the collectors, connect them to the storage tank and the existing plumbing system. Use the provided pipes or fittings to establish proper connections. Ensure that all connections are tight and leak-proof to prevent any water or heat loss.
To maximize the efficiency of your solar collectors, it is crucial to properly insulate and seal all the connections and exposed pipes. Use high-quality insulation materials to cover the pipes and make sure to seal any gaps with appropriate sealing materials. This will help retain heat and prevent any energy wastage.
By following these steps, you can successfully install your solar collectors and enjoy the benefits of utilizing renewable energy for heating water.

System Testing
To test the newly installed system for leaks and proper functionality, follow these steps:
- Verify the flow of water: Turn on the system and ensure that water is flowing smoothly through all the pipes and components. Check for any signs of leaks, such as drips or puddles around joints or valves. Inspect all connections and fixtures to ensure they are secure.
- Example: Turn on the water supply and observe the flow of water through the pipes. Inspect all joints, valves, and faucets for any visible leaks. Run the water for a few minutes to ensure consistent flow without any interruptions or fluctuations.
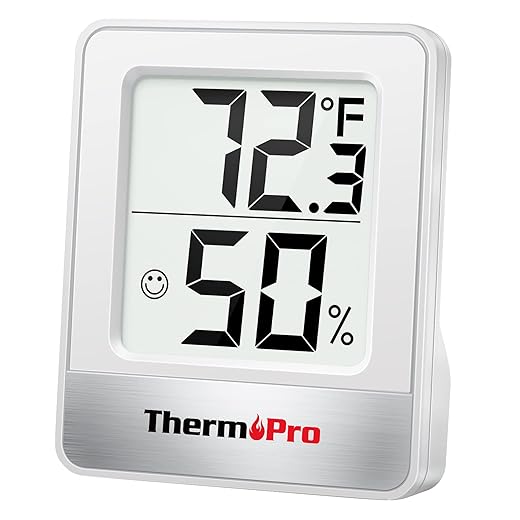
- Check the temperature rise: If the system includes a heating element, such as a boiler or water heater, verify that it is functioning correctly. Measure the temperature of the incoming water and then check the temperature of the water after it passes through the heating element.
- Example: Use a thermometer to measure the temperature of the incoming water. Record the initial temperature. Turn on the heating system and run the water through it. Measure the temperature of the water again after it has passed through the heating element. Compare the temperature rise to the desired specifications.
- Make necessary adjustments or repairs: If any issues or problems are identified during the testing, take appropriate actions to rectify them. This may involve tightening loose connections, replacing faulty components, or adjusting settings.
- Example: If a leak is found, turn off the water supply and tighten the affected joint or replace the faulty valve. If the temperature rise is not within the desired range, adjust the heating system’s settings or consult a professional for further troubleshooting.
By following these steps and thoroughly testing the newly installed system, you can ensure that it is free from leaks and operating properly.


Maintenance and Troubleshooting
Regularly maintain your solar water heating system to ensure optimal performance. Begin by cleaning the collectors to remove any dirt or debris that may have accumulated. Use a soft brush or cloth to gently scrub the surface of the collectors, taking care not to damage the delicate components.
Next, inspect the collectors for any signs of damage, such as cracks or loose connections. If you notice any issues, it is important to take immediate action. Tighten loose connections and replace damaged components, if necessary. Remember to turn off the system before making any repairs.
To troubleshoot common issues, such as reduced efficiency or leaks, start by checking the water pressure and temperature. Ensure that the pressure is within the recommended range and that the temperature is reaching the desired level. If there is a significant drop in efficiency or if you detect leaks, it may indicate a problem with the circulation pump or valves. Check these components for proper functioning and make any necessary adjustments or replacements.
It is also essential to monitor the performance of your solar water heating system throughout the year. During winter months or in areas with prolonged periods of cloud cover, the system may require additional support from a backup heating source. Keep an eye on the system’s output and consult with a professional if you notice any significant fluctuations or abnormalities.
By regularly maintaining and troubleshooting your solar water heating system, you can extend its lifespan, improve its efficiency, and ensure consistent hot water supply.
Key Takeaways
In conclusion, designing and building your own solar water heating system requires careful research, thorough planning, and precise installation. Throughout this guide, we have highlighted the key steps and considerations needed to create an efficient and reliable system. By conducting thorough research, you can gain a comprehensive understanding of the different components and technologies available. Planning is crucial to ensure that the system suits your specific needs and requirements. Lastly, proper installation is necessary to maximize the system’s efficiency and longevity. Remember, investing time and effort into these stages will result in a successful solar water heating system that can save energy and reduce utility costs.
Necessary Equipment