

In this step-by-step guide, we will walk you through the process of charging a portable solar generator. A portable solar generator is a compact and eco-friendly device that converts sunlight into electrical energy, which can then be used to power various electronic devices.
The purpose of this guide is to provide you with clear and concise instructions on how to effectively charge your portable solar generator, ensuring that you can have access to sustainable and renewable energy wherever you go. Whether you are camping, traveling, or experiencing a power outage, a portable solar generator can be a reliable source of energy.
By following our step-by-step instructions, you will learn how to properly position the solar panels to maximize sunlight absorption, connect the generator to the panels, and monitor the charging progress. We will also provide tips on maintaining the panels and generator for optimal performance and longevity.
Charging a portable solar generator is a simple and straightforward process, and with our guide, you will be able to harness the power of the sun to charge your devices on the go. So let’s get started and learn how to charge your portable solar generator!
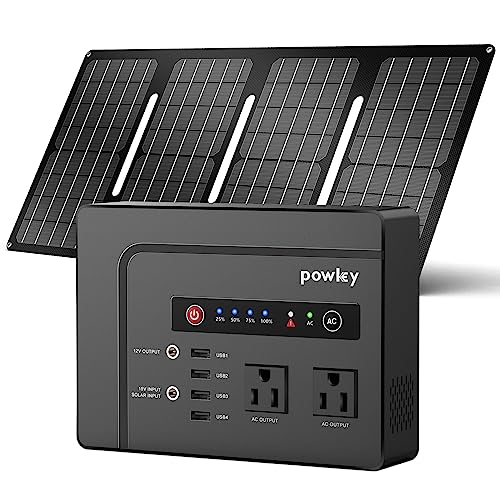
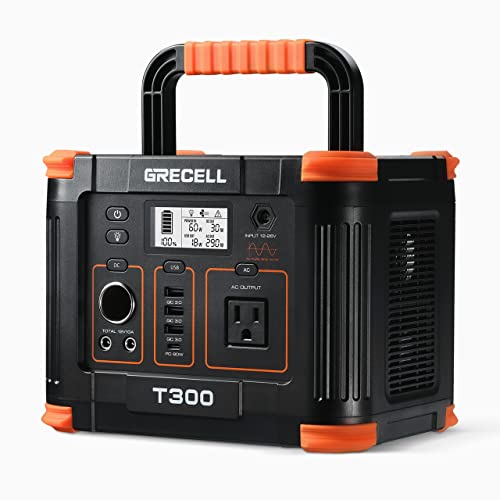
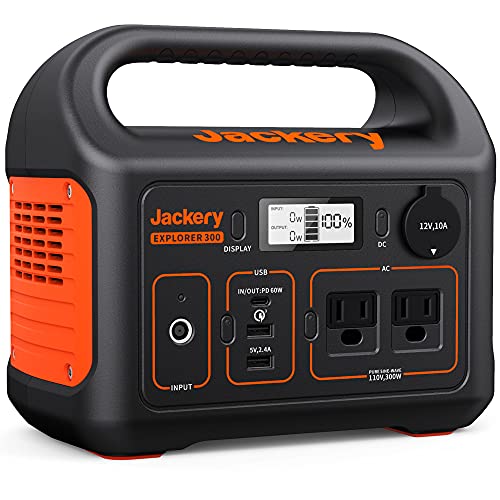
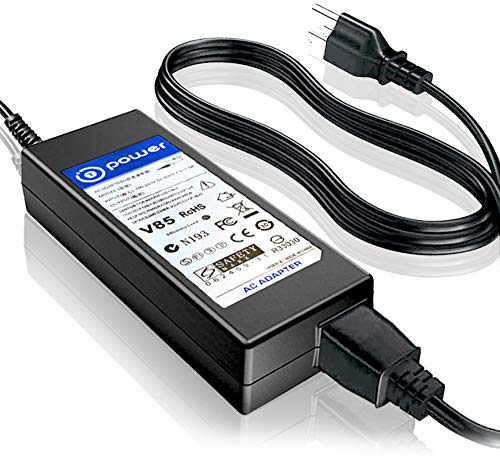
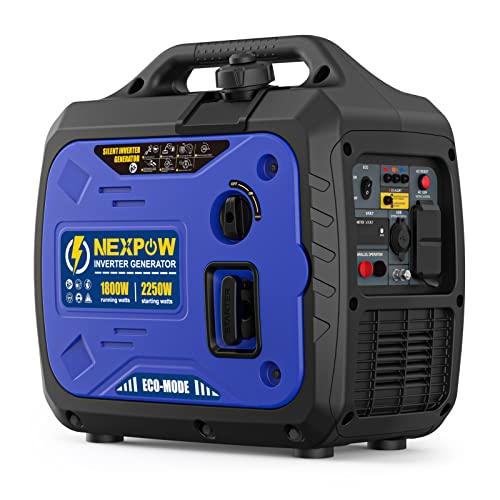
Top-rated portable solar generators

Step 1: Gather the necessary equipment
To collect all the necessary equipment for charging a portable solar generator, follow these steps:
- Solar Panels:
- Determine the wattage required for your portable solar generator. This will help you choose the appropriate size and number of solar panels.
- Purchase solar panels that match the wattage requirement. Look for panels with high efficiency ratings and durable construction.
- Ensure that the solar panels come with mounting hardware or purchase mounting brackets separately if needed.
- Charge Controller:
- Choose a charge controller that is compatible with your solar panels and battery.
- Consider getting a controller with built-in features such as overcharge protection, low voltage disconnect, and battery temperature compensation.
- Verify that the charge controller can handle the maximum current output of your solar panels and battery.
- Battery:
- Determine the capacity and voltage requirements for your portable solar generator.
- Opt for a deep-cycle battery, as it is designed to be discharged and recharged repeatedly.
- Match the battery capacity to the expected usage and energy demand of your generator.
- Necessary Cables:
- Purchase cables to connect the solar panels to the charge controller, charge controller to the battery, and battery to the load.
- Ensure that the cables are of appropriate length and gauge for minimal power loss and safe operation.
- Consider getting extra cables for flexibility and future expansion.
Remember to carefully read the specifications and compatibility requirements of each component before making a purchase. By gathering all the necessary equipment, you will be well-prepared to charge your portable solar generator efficiently.


Step 2: Set up the solar panels
To maximize the efficiency of your solar panels, it is crucial to position them in an area with maximum sunlight exposure. Here are the steps to follow:
- Choose a location: Identify a spot that receives the most sunlight throughout the day. Ideally, this should be an area without any shading from trees, buildings, or other obstructions.
- Mount the panels: Securely attach the solar panels to a sturdy surface or mounting brackets using appropriate hardware. Make sure the panels are angled correctly to capture the maximum amount of sunlight.
- Connect the charge controller: Use the provided cables to connect the solar panels to the charge controller. Ensure that the positive (+) and negative (-) terminals of the panels and the charge controller are properly aligned.
- Verify connections: Double-check all the connections to ensure they are tight and secure. Loose connections can affect the performance of your solar panels.
- Inspect for obstructions: Before finalizing the setup, inspect the area around the panels for any potential obstructions that could cast a shadow and reduce sunlight exposure. Trim any overhanging branches or remove any objects that could block sunlight.
By following these steps, you can position your solar panels for optimal sunlight exposure and connect them to the charge controller effectively. This will help maximize the energy output of your solar system and ensure its efficiency.

Step 3: Connect the charge controller to the battery
Attach the charge controller to the battery by following these simple steps. First, gather the necessary materials: a pair of appropriate cables and the charge controller. Before beginning, make sure the battery is disconnected from any power sources.
Start by identifying the positive and negative terminals on both the battery and the charge controller. Usually, the positive terminal is marked with a (+) symbol or a red color, while the negative terminal is marked with a (-) symbol or a black color.
Next, take one end of the positive cable and connect it securely to the positive terminal of the battery. Make sure the connection is tight to ensure a good electrical connection.
Now, take the other end of the positive cable and securely attach it to the positive terminal on the charge controller. Again, ensure a tight connection.
Repeat the same process with the negative cable. Connect one end to the negative terminal of the battery, and the other end to the negative terminal on the charge controller.
Finally, double-check all the connections to ensure they are properly attached. Make sure there are no loose or exposed wires that could cause a safety hazard. Once you are satisfied with the connections, you can proceed further with the installation of the charge controller system.
Remember, connecting the charge controller to the battery is a crucial step in the setup process. It is essential to follow these instructions carefully to ensure a safe and efficient system.


Step 4: Check the battery charge level
To verify the current charge level of the battery, follow these steps:
- Turn on the portable solar generator by pressing the power button.
- Locate the battery charge indicator on the control panel. It is usually represented by a set of bars or a numerical value.
- Observe the charge indicator and determine the current charge level. If the indicator has bars, count the number of bars or use any numerical values to gauge the battery’s charge level.
- Take note of the current charge level and compare it to the indicator’s maximum capacity. This will help you estimate how much charging time is required to fully charge the battery. Typically, a full charge is indicated when all bars are filled or the numerical value reflects 100%.
- If the battery is at a low charge level, plug in the portable solar generator to a power source or solar panel to begin the charging process.
By verifying the battery’s current charge level, you will have a better understanding of the charging time required to fully charge the portable solar generator. This knowledge will help you plan and utilize the generator efficiently for your power needs.


Step 5: Begin the charging process
To begin the charging process, you will need to turn on both the charge controller and the portable solar generator. Follow these steps:
- Locate the charge controller and the power switch on the portable solar generator.
- Flip the switch on the charge controller to the “ON” position.
- Locate the power switch on the portable solar generator and turn it on.
- Ensure that the charge controller and the portable solar generator are properly connected to each other.
- Check that the cables are securely plugged in.
- Verify that the positive and negative terminals are correctly connected.
- Once the charge controller and the portable solar generator are turned on and connected, you can start the charging process.
- The charge controller will regulate the flow of energy from the solar panels to the battery, ensuring safe and efficient charging.
- Keep an eye on the charge controller display to monitor the status of the charging process and the power being supplied to the battery.
By following these steps, you can successfully begin the charging process by turning on the charge controller and the portable solar generator, allowing the charge controller to regulate the energy flow from the solar panels to the battery.


Step 6: Monitor the charging progress
To monitor the charging progress of your battery, keep an eye on the display or indicators of your charge controller. The display will provide you with important information about the charging status, such as the current voltage, charging current, and battery capacity. By monitoring these indicators, you can estimate the remaining time for a full charge.
Make sure to frequently check the charge controller’s display throughout the charging process. Look for any changes or updates that indicate the progress of the charge. It is crucial to understand the display and the information it provides so that you can make informed decisions regarding your battery usage.
By paying close attention to the charge controller’s display or indicators, you can keep track of the charging progress and ensure that your battery is being charged effectively. This will help you estimate how much time is needed until the battery reaches full capacity, allowing you to plan your energy usage accordingly.
Step 7: Disconnect and store
Once the portable solar generator is fully charged, it is important to properly disconnect and store the equipment for future use. Follow these steps:
- Turn off the power: Before disconnecting any cables, make sure to turn off the power switch on the solar generator. This will prevent any electrical surges or accidents while handling the equipment.
- Disconnect the cables: Begin by unplugging all the cables connected to the solar generator. Start with the AC/DC adapter and then disconnect any other power cables or extension cords. Carefully remove the cables to avoid any damage to the connectors.
- Store the cables: Keep the cables neatly coiled and secured. You can use cable ties or Velcro straps to keep them organized. Find a safe, dry place to store them, away from any sharp objects or potential hazards that could cause damage.
- Store the solar generator: Find a suitable location to store the solar generator itself. Make sure it is stored in a clean, dry, and well-ventilated area. Avoid storing it in extreme temperatures or direct sunlight, as this can damage the equipment over time. Use the carrying case or protective cover, if included, to keep dust or dirt away and provide additional protection.
By properly disconnecting and storing your portable solar generator, you ensure its longevity and maintain its performance for future use. Remember to keep the equipment in a safe place, away from any potential dangers or damage, so that it is ready to use whenever you need it.
The importance of proper charging
In conclusion, we have explored the step-by-step process of charging a portable solar generator. By following these instructions carefully, you can effectively harness the power of the sun to charge your generator and keep it ready for use wherever you go. Remember the significance of selecting a suitable charging location, ensuring proper solar panel placement, and monitoring the charging progress. Adhering to these guidelines will not only maximize the efficiency of your portable solar generator but also extend its lifespan. So, power up and enjoy the convenience and sustainability that comes with owning a portable solar generator.